Wednesday, November 9, 2016

Favorite Blanket fix - Round 2

Do you remember when we did a Favorite Blankey fix-up?  It was, oh, 6 months ago I put a new binding on Mr. A's favorite blanket to save it from certain destruction!


Well despite efforts by my mom to get him a new blanket, this is still his blankey and still crucial to bedtime!  He has gone to bed without it (a stark improvement over not that many months ago) but it is still his go-to-comforter!  Well, now the problem is all the ties are coming out!


All the red-paw prints are missing ties... (they seem clustered closer at the top because of the angle the pic was taken at.  The are all very even placed in reality)!  The yellow circles are untied-ties just waiting to come out!  The rest of them are just little knobs of yarn.  I tell you he loves his blanket!

So, it was time to re-tie his favorite blankey!


I know there's probably at least one person out there thinking, good grief! time to put away that blanket and move on!  He's old enough!  Well, that's not how I do things, and hey, I love a challenge! It doesn't hurt anything to let him have his favorite blanket and he won't take it to kindergarten!  (or then again maybe he will, as a smaller version of the current blanket, but that really won't hurt anything either!)  

So first thing I did was borrow a quilting frame from a lady in our ward.  I wish I had one of these myself, but that just isn't feasible right now!  So you could totally use the big wood frames that are so common, that it is what this blanket was originally quilted on, but I just didn't want that in my house and it is such a small blanket, I really wanted something smaller!  


I tell you, I want one!  This is a Q-Snap Floor Frame.  So snazzy!  Check it out!  you just use the plastic grips to snap the blanket around a pvc frame!  The frame takes less than 5 minutes to assemble  and very, very little storage space!


After I put the blanket on we started to snip the ties that remained and re-tie the missing ties.  My Husband and I just tied as you normally would, working our way around!  


Mr. A & Mr. C both helped us best they knew how.  We ended up putting them to bed and finishing it later that evening, but all said it took us no more than an hour!


Mission Accomplished!  I have, yet again, given his blankey a few more months of life!  Until next time!

What have you done to rescue your little's favorite comfort item?

Tuesday, November 8, 2016

At it Again! Wedding Flowers - Part 4

Can you believe it??  I'm at it again!  More wedding flowers!  This round is not super elaborate, but still going to be a lot of fun!  This time we are doing silks for the bridal pictures and the centerpieces on the tables.  Then the day of the wedding, there will be live for the wedding party, etc.  

Silks are always a bit of a toss up with silks, some are awesome, some are, meh.  But these ones are really nice and I have to admit, it is really nice to be completely done with the centerpieces and be 4 days out from the wedding!  

So here is what we have!


Bridal Bouquet, before it was wrapped!


Aftermath of our living room from the bridal bouquet!


One of the biggest struggles with silks tends to be the stems.  Some of the nicer ones have realistic looking stems, but they still often come in bunches and the stems on bunches are always super-super skinny.  To combat this I used the super long, nice stems, that extended below the length I needed.  After I wrapped the original stems I hot glued the extra stems anywhere that was lopsided or skinnier to make a nice rounded and fat!


Then I wrapped the stems again with the tape 


Then I wrapped the stems with ribbon and lace as normal.

Whew!

Friday, November 4, 2016

Thankful Tree

Last year as we hit November we realized Mr. A really didn't understand the concept of being 'thankful.'  As such I created our thankful turkey!  It was really simple, a big circle of butcher paper a smaller circle and rectangle for a neck and head and a bunch of construction paper feathers.  

Starting the beginning of November every night before we ate dinner everyone would say something they were thankful for!  Mr. C often said e-i-e-i-o as he knew the dying but still had a generally small vocabulary, and Mr. A repeated what we said a lot at first, but with time he started to come up with his own things, like cheese, airplanes, & grapes.
We still have our thankful turkey in the wall, but this year we added a thankful tree to remove us to be thankful again!
All I did was cut out a trunk from one sheet of construction paper and the place where the branches split from another piece, then used the scraps to make the branches longer. Then I cut leaves from different colors of paper and put them in a container with markers and tape. Mine is an old butter tub that I wrapped in fun paper.
Now every night we write on another leafand stick it on our tree.  I figure by Thanksgiving we should have a fully leafy tree!!!

How do you remember to be thankful this time of year?

SaveSave

Friday, October 7, 2016

Be-YOU-tiful Bow Hanger DIY!

My husband jokes that I've waited 27 years for a girl, he's not going to hold me back in making cutesy girl things!  I am the oldest in my family with three younger brothers and then our first two kiddos are boys (of course)!  So when we found out our sweet baby is going to be a girl, we were both kind of excited!

Now over the years I have made things here and there for little girls, sometimes for our nieces, and sometimes just in hope of a future daughter.

So I have a couple of bows and headbands and I wanted a cute way to display and organize them!

I always want her to feel beautiful, in a gorgeous dress or a slumpy t-shirt, so I give you the Be-YOU-tiful bow hanger!


Ribbon of choice.  I recommend a satin ribbon or woven, 1inch.  A sheer won't be as strong or hold it's shape as long!


Canvas!  This was one left over from my button art project last year.  


In addition, hot glue, tulle, and a staple gun.

First I painted the canvas purple and in yellow at the top "Be-You-tiful!"
Then I figured out about how far apart I wanted the ribbon, measured and glued the ribbon down. 


I also glued down some tulle to the top for a hanger.  After the glue dried I stapled the ribbon and tulle down to make sure they wouldn't pull off.


Voila! Bow holder for all the bows little girl will surely have! (especially if I have anything to do with it!)

Monday, October 3, 2016

Halloween Crow Wreath

Well, somehow I managed to not get any pictures of the process, but I made this awesome Halloween Crow wreath for my Husband's cousin, and it was SO EASY!!!


You'll Need:

A Wreath Form, mine was a wicker one, which I thought was cool because it looked like a nest or sticks on a tree.

Crows to go around.  Mine were from the dollar store, they are foam with feathers and black glittery!


Trusty Hot Glue Gun.  Seriously, where would a crafter be without hot glue?!

floral wire (or other wire) and wire cutters

First: Spray paint the wreath black!

Next: I pulled off the feet from each crow and wired them to the wreath.  I stuck the floral wire in the holes where the feet came out and a glob of hot glue.  Then I put a glob of glue on the bottom of the birds and wired them to the wreath.  Once the glue had set I went around from the bottom of the wreath and filled in any gaps between the birds and the wreath with glue.

You'll have to decide where you want the wreath to line up with the birds.  I wanted to make use of the widest part of the birds to use less birds, so placed my birds accordingly.  If you want a bigger wreath or to use more birds attach them closer to the head, where they are more narrow.


When everything is dry, take some black paint and touch up any spots that aren't black anymore.  Some of the glitter had rubbed off the tops, and there were white spots where I had pulled the feet out.

Finally hang up your awesome wreath on a wreath hanger or use some floral wire to wire it to a hook or nail or thumbtack on your door.

Enjoy!

Wednesday, September 28, 2016

Something Special Coming February 2017!


I don't know why the pic won't load all the way... I tried twice.


Friday, September 9, 2016

Paw Patrol Birthday Party!

"Paw Patrol, Paw Patrol, we'll be there on the double!"

Mr. A has really been into paw patrol these days so naturally for his birthday he wanted a paw patrol party!

His favorite color also happens to be red so naturally his favorite pup is Marshall, the fire dog!


We started with Fire hats & Puppy ears!


Then of course we put out the fire at someone's house by popping the balloon flames!
(Tutorial found HERE)


We colored pups and glued googly eyes!


And what is a Birthday Party without cake!  Paw-print-Marshall-cup cakes!


White with black (chocolate chip) spots, with a red hat!  Just like Marshall!


And snacks!  Grape-balls, Puppy chow (Reeces puffs cereal), and cheese-fetch-sticks!  and of course, don't forget the water bowl (or pitcher any way!  I didn't trust 4yr olds with a punch bowl...)


And of course, LOTS of red balloons and streamers!  and a few extra fireman hats on the wall!


The kids had so much fun!  The building on fire was especially enjoyable!


Mr. C & Mr. A playing with sticker books (gift from a friend) after everyone went home.

SaveSave

Wednesday, September 7, 2016

How to: Vibrant Cake Colors!

My son's favorite color right now is RED.

It's also his birthday...

Which naturally means he wants a red cake...

I don't know if you've every tried to make a cake mix red (without using red velvet of course), but most of the time it just comes out.... pink.

In fact, most red velvet recipes call for an ENTIRE BOTTLE of red food coloring!  Not just one of those cute little squeezy guys, a full 2 tablespoons, 1 oz bottle of food coloring!

Heaven forbid you need green or orange or yellow... oh yellow!  I've never tried, but I'm pretty sure to get a vibrant yellow you would need more than 1 bottle!

I just really don't like eating a cupcake that will turn your mouth and insides un-natural colors!

So with this in mind we were shopping for cake mix (because for all my craftiness, I'm a cake-mix gal!) and we passed the jello mixes - Eureka! - Vibrant colors and extra flavor to boot!

It was really simple really, just follow the directions on the box and then dump the jello mix in! (the small size box.  I used the off-brand variety)

Boom!  Red cake that doesn't turn your insides funny colors, and bonus points, it tasted oh-so good!


Yum!!!

They had a slight raspberry taste and were absolutely delicious!

I used Raspberry, Strawberry or Cherry probably would've been even more red, but I prefer raspberry. (had a bad experience with cherry jello one time, some sugar free jello varieties taste like benadryl *shiver*)

Show me your creations! 

Friday, September 2, 2016

Fire Hat & Dog Ears!

So Mr. A wants a Paw-Patrol-Marshall themed party!  So we decided to make totally awesome fireman hats with doggy ears! 

We started at Firehouse Subs where they very kindly gave us 10 of their hats, no questions asked, for free!  THANKS Firehouse Subs!!!


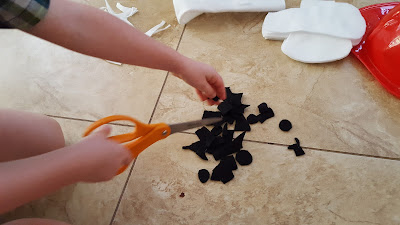
Next I gave the boys some scissors and black felt and told them to cut spots for the ears!  Now we started with safety scissors, but they just didn't cut it (haha, that was unintentional, but really!)  So once I was done cutting out the ears I closely monitored while they used my sewing scissors to cut the spots!

I was going to figure out how to make a template for the ear but just didn't get it done, so if you want to use my ear shape, just print the picture below and cut it out.  You can probably size it on your computer to any size you want.  I cut them out of white felt.


I have a big bag of felt scraps, mostly from by-the-yard projects that I pulled this felt from!  I think this is leftovers from snowman-stockings one year in college!

The boys struggled with curvy edges, so after we had enough spots cut I had them arrange them on the ears and I rounded out the edges and glued them on with my trusty hot glue gun!


Boom, ears done!  I seem to have lost the picture, but after the glue had cooled I put a tiny-thin bead of glue just underneath the rim of the hats and stuck on the ears (make sure the spots face out!  If you can turn down the temp on your glue gun, do, the glue will melt the hats if you apply too much or it's too hot!  Or, if not, just unplug and let the glue gun cool down, then plug it back in and use it as soon as you can squeeze glue out, not necessarily when it's 'hot'


Hats, done!  They looked soooo cute on all the kiddos, I can't wait to hand them out at the party to all of their friends!

SaveSave

Monday, August 29, 2016

Birthday Games! Fire House!

Mr. A wants a Paw Patrol Birthday party this year!  For one of the games we decided to take one of his favorite activities, dart-less balloon game, and make it fit into the paw patrol theme!  Now Mr. A's favorite pup is Marshall, the fire-dog, so we decided to theme the party appropriately!


I give you the firehouse-balloon game!

I started with a foam-core board from the dollar store and a handful of orange and yellow balloons, and some blue confetti.

I painted the foam core to look like the front of a building with windows and a front door.  I sort of taped the roof on, but to be honest it kept falling off... When leaned against the wall it worked alright.


Yeah, I know it looks purple, but it really is blue!  for the confetti I simply ran a couple sheets of construction paper through our paper shredder!  Instant, personalized confetti!


Then I used a funnel and a stick to stuff the balloons full of confetti!


The morning of my husband blew up the balloons and we put the board together in the same way we did our dartless balloon game found HERE.  Then when it came time for the part we let each guest take a turn to throw bean bags and pop the balloons!  They thought it was pretty much the coolest thing ever!  


Yay for tile floors that sweep up so easy!

Have fun!  Show me your creations!  How did you adapt the dartless balloon game to fit your party or event??

SaveSave

Wednesday, August 24, 2016

Kitchen Chair Re-do !

I love taking something old and ugly and giving it a new life!  (Of course if you follow my blog much you already know that!)  Upholstering chairs sounds pretty scary and intimidating, but really, it's easy-peasy and so much fun!  Really a simple way to make something uniquely yours!

When we got married we bought a round kitchen table with four chairs that I loved!  

The chairs are black with a brown suede-like seat, they were perfect!

Then we had kids...

Now they look like this...


Yuck!  The suede stuff just doesn't come clean real easy, and kids just need everything to be wash-n-go!  So, lets re-do them!!!


First, flip the chair over and unscrew the seat.  My chairs had four screws, in the corners, holding them on.  (this picture turned out kind of odd, but it is the seat on the floor after taking the screws out)


Tabs where the screws were.


Then start to remove the old fabric.  I chose to be gentle on the black stuff so I could use it later.  Brown stuff, not so much!  Mine was stapled down.  If you can get the staples out that would be ideal, mine were REALLY tight, so I just made sure they were flat and called it good!

Next, I got some very-wipeable fabric, the name of which I don't remember and can't find, but the back is very much a normal weave cotton/poly fabric, but the front is very vinyl like.  Wipes clean super easily!

Cut out your fabric so you have 3 or more inches extra all the way around.


I used the old foam from the chairs, so either reuse the old or cut the foam to fit your seat.  Our foam was yellowed so I also put some plain-white fabric between the foam and 'nice' fabric.

Layer as follows: 

Main fabric (face down on the floor/table)
Foam
Wood (or otherwise) seat piece

Then pull up one side and staple from corner to corner every 2 inches or so (as needed to secure fabric)

Next, do the same on the opposite side, pulling the fabric so it is somewhat tight and you don't get wrinkles.  This also helps the seat have a nice smooth appearance.

Repeat on the other two sides likewise.


Now the corners... These get tricky sometimes.  Starting with the corner of the fabric pull it in on the diagonal and attach.  Then, fold the remaining fabric so it lays as flat and non-bunchy as possible.  Also pay attention at this point to where your screws will go in later!  The first one I did I didn't do this and we had troubles keeping the screws in and the seat attached!


Repeat to all four corners


Finally, reattach the bottom fabric, or cut a new square to cover the mechanics of things.  Finally screw the seat back on!  

Sadly I don't have a picture of the finished chair... 

You see, I did two chairs nearly two years ago and just finished the last two.  But I finished the last two so we could give the set to my Husband's brother and new wife... We just don't fit it anymore (which is why we refinished this table recently!)  Thereby, as I write this post, the chairs are not just a couple steps away, but across town... oh well.)

Give it a try and let me know how things go!  The concept applies to most chairs!


SaveSaveSaveSaveSaveSaveSaveSave