Tuesday, July 21, 2015

Swimsuit Alteration

It was time for a new swimsuit this year... the last time I bought myself a suit was... 4... years ago.  When we got married... So it was starting to stretch in funny ways and was just not working anymore! 

Swimsuit shopping: yuck!  I'm fairly confident in my body, but hey, I want to wear more than three triangles of fabric!  For the last several years I have gone tankini, but this time I decided on this awesome suit:


It's fully lined!  What?! (seriously, why don't people line EVERY suit??)  Bonus: it was 50% off!  Sweet!  My only problem was that the v-neck was pretty deep on me...  So, time to make some adjustments!

First I put it on and figured out where I wanted the neckline to be.


Next, I cut a rectangle of black, swimsuit material, big enough to span the gap with room to spare.


Next, I turned one edge under a half inch and used my snazzy double needle to hem it.
Tip: ALWAYS sew on the TOP with a double needle, the bottom will be a zig-zag.
(because one bobbin serves two needles, the bobbin thread zig-zags between the two sides)


In an effort to keep this fabric from sagging (thus defeating the purpose) I threaded a quarter-inch elastic through the hem and pulled it just a little bit taunt.


Next, I pinned the black piece to the suit and top-stitched down the existing stitching to hide the seam and attach the added piece.


View from the inside... not perfect, but it worked!  Once it was attached I trimmed away the extra fabric and tried it on!


All done and ready for a trip to the pool!


Wednesday, July 15, 2015

Backpack Fix-up!

I switched to a small-ish backpack for my purse lately and love it!  It is super nice to be completely hands-free with two kiddos and plenty of space for my stuff and their stuff! (and way too much extra junk if I'm not careful!)  The bag has one big pocket and three small pockets with flaps that snap shut... Unfortunately I have broken two (almost three) of the snaps already, I really need them to stay shut though or stuff falls out when I toss it in the car.  Soooo I added a magnetic snap... the problem here is that it is, well, ugly...

So I went to the craft store and found some flowers that matched the bag...  


I cut the stem off as absolutely-positively short as I could!


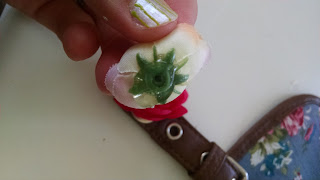
I glued the flower back together (when you cut that much stem off, the flower just comes apart)


Then attached them to my bag over the ugly side of the new snap.


All done!  No more diapers, receipts, wallet, or anything else falling out of my purse!  Bonus: It's cute!


Wednesday, July 8, 2015

Two New Shirts - Color Blocking!

So I had these two shirts... I never loved the fit or the blah-ness of them, so I decided it was time to change things up a bit!


First!  I cut both shirts at the exact same place (they were identical shirts, different colors), a half inch below the sleeve seem

Then, just switcheroo the tops!


Add a strip of stretchy lace and pin the pieces back together!


A quick zig-zag to sew them together.


Then I top-stitched the lace down at the side seams.


Volia!  Two brand-new color-blocked shirts that I love!

(Finished product pics to come... oops!)


Thursday, July 2, 2015

DIY Sunflower Seeds

We planted Sunflowers in our garden this year in hopes of shading some of the other plants.  In the long run they died before we were done with them, but they were beautiful while they lasted! We have some serious need of fertilizer all the way around! We just put our garden in and figured we would see what happened!  So far it's working out better than it could, but with room for improvement.

Did you know you can make your own sunflower seeds??  They are pretty tasty, let me tell you!  First you have to grow your sunflowers!  The bigger they get, the better!  Our seeds are pretty small because they stopped growing prematurely, but they are still tasty, just small.

'Pick' your sunflowers!  Basically just take a knife or what I call nippers (the tool you use to trim small tree branches or bush branches) and cut the flower off the stem an inch or two from the head... you really just want the head, extra stem just gets in the way!


Next, you have to separate the seeds from the rest of the head... which is a bit tedious, but with lots of good help and company (my husband and sweet boys!) it can be a fun family project!


Getting there....


Empty flower heads, a pile of seeds!  Next, rinse the seeds then let them soak overnight in salt water, like super salty!  Next morning, drain the water and dry them off (I used paper towels)  Spread them out on a cookie sheet, SINGLE LAYER, you really don't want them stacked at all.

Spray them with an oil-based spray or toss in olive oil and bake at 300 degrees (F) for 30-40 minutes, stir occasionally.  They are done when the shells start to brown and get crispy.  Let cool and enjoy!!!