Showing posts with label White. Show all posts

Monday, September 14, 2015

Part 2: Grandma's Washstand!

Last time I took off all of the hardware off the washstand and gave it a good wipe-down.  Today, we are cleaning the hardware! 

Now my pictures only encompass the door knobs, but I did the same thing for all the pieces.

The started looking like this....
  
Yuck.  YEARS of grime, tarnish, oils from hands, etc. had made their mark on the hardware.

First I soaked them in a vinegar water.  There's probably a 'safe' proportion, but I just guessed.... warm water and vinegar.  Then I started scrubbing a bit with a toothbrush.  

Better....

 I realized I needed something a little bit abrasive to really do the trick, so I took everything out of the vinegar, and while still wet I sprinkled them with table salt.  Then I scrubbed some more, periodically wetting my brush in the water or adding more salt.

 Much better!
(you can see one of the drawer handles in the background, covered in salt)

Now some of them still look, meh, because the finish was just plain worn off... still not sure what I'm going to do there.  I'm torn between restoring and a complete makeover.  Lucky for me, I don't have to decide yet! 

I have two color schemes that I like right now.  One is to paint the whole thing a bright white, and replace the hardware as is.  I don't know what the wood looks like yet, or how it was originally, but that is how I always knew it to be at Grandma's house.

The second is to paint it all a bright white but to paint the recessed areas a bright white-mixed with a titch of yellow.  Hardware either original, painted to look new, or painted a whatever color matches best.  Thoughts?  Ideas?  Opinions?

Monday, September 7, 2015

Furniture Makeover! Grandma's Washstand

My sweet Great-Grandma passed away this spring, and when we went out to visit family this summer my Grandma mentioned that this washstand needed so TLC and it could be beautiful again.  I took one look at it and fell in love!  I casually mentioned that it would be something I was interested in and hoped she had noticed!  Later that same day she said that I could have it!  So we shoved all our luggage and this washstand into the back of our car for the 10hr trek home!


The left door is broken, as you can see.  It actually looks like it has been fixed before, but the side panel of wood has separated from the rest of the door.  My plan is to strip everything first and then see what I'm really up against later before I figure out how to fix it.


Now all I need to do is strip the LAYERS of paint!  You really can't tell from most of these pictures, but the paint is really.... gunky?  You know that look when someone has painted a piece of furniture... and painted it.... and painted it!  I am interested to see what I come up with once the paint is removed!


First things first!  Take it apart and remove all the hardware!  The drawer pulls and door knobs came off no problem!  The hinges.... well... first, who puts hinges on with nails??? Who?? (screws people, screws.)


Second, who's idea was the two and half inch nail?????  Seriously?  I tell ya, I've pulled a few nails out of wood in my day, but this was almost more than I could manage.  The nature of the project and the size/surface area I had to work with mad pulling these buggers out nearly impossible!


Got 'em!

More to come!  Any ideas on how to paint it/finish it when I'm done?  Comment below!

Wednesday, July 15, 2015

Backpack Fix-up!

I switched to a small-ish backpack for my purse lately and love it!  It is super nice to be completely hands-free with two kiddos and plenty of space for my stuff and their stuff! (and way too much extra junk if I'm not careful!)  The bag has one big pocket and three small pockets with flaps that snap shut... Unfortunately I have broken two (almost three) of the snaps already, I really need them to stay shut though or stuff falls out when I toss it in the car.  Soooo I added a magnetic snap... the problem here is that it is, well, ugly...

So I went to the craft store and found some flowers that matched the bag...  


I cut the stem off as absolutely-positively short as I could!


I glued the flower back together (when you cut that much stem off, the flower just comes apart)


Then attached them to my bag over the ugly side of the new snap.


All done!  No more diapers, receipts, wallet, or anything else falling out of my purse!  Bonus: It's cute!


Saturday, June 20, 2015

Patriotic Wreath!

July 4th is coming up and I'm excited!  There are lots of reasons to be excited, family gatherings is definitely one of them!  We have a lot of family coming into town because my husband's brother is coming home from his church mission a few days later!  (More on that to come)  So this last year we moved into a house from an apartment, so I finally have room to decorate for the seasons!  So here is my patriotic-4th of July wreath!


First, oh how I would love to paint my door a fun color!  Like Teal or Purple or Red or Yellow!  But Alas, HOA rules say probably not happening...

Anyway, first I needed a wreath form of the foam variety.  However, getting to the craft store to get one is sometimes a struggle with Mr. A and Mr. C so I improvised and it actually worked quite well!


Enter lime-green pool noodle!  This is just a plain ol' dollar store pool noodle and a little bit of duct tape!
UPDATE: The pool noodle is actually not a great option... turns out it sags from the weight of the felt, and alas, by the end of July I had an oval wreath instead of a circle wreath...  Take the time and $5 bucks and go buy one!  (so I don't really know exactly how much it will cost, but I do know they have them at Hobby Lobby and I do know that you can get a %40 coupon online or on their app always so that is a great place to start!)


Next, a quarter yard of Red and White felt and about 3/4 a yard of Blue.  
Cut the felt into 2-ish inch squares.  Really it doesn't need to be exact, but I do suggest making all of them pretty close to the same size, otherwise you will have high and low points on your wreath.


You will also need a box of the cheap, flat head, pins.  They run about $3 a box and I used most of a box.

I divided my wreath form into 12 even sections, 7 for red and white stripes and the other 5 for blue.  

Choose a color to start from and fold a square of felt in half diagonally,


Then in half diagonally again.  It doesn't have to be perfect by any means, in fact most of mine weren't because I liked the variety it added to the wreath!


Then put a pin through the point of the triangle and stick it on your wreath form!


Now do it again, and again, and again....  I worked on it for several evenings while my husband was doing homework after the boys had gone to bed.  This is one of those couple-of-movies kind of project.


As you go along fluff and separate the felt, if you don't you will end up needing a lot more felt to cover your wreath!

Once you are all done with the felt use some silver wire and wrap it around a marker to make the spring for the stars.  My stars are felt with glitter glue and hot glue to make them a little more stiff.  You could also use glitter felt or cardstock to make the stars.  Glue or otherwise attach the stars to the wire springs and stick them into the blue portion of the wreath.  I used five stars, but you can use however many you want.  I do suggest an odd number of stars.

In all this wreath cost me about $7-$8!  Not bad if you ask me!

In the end you get this!


Happy Independence Day!!!

Monday, June 15, 2015

Patriotic Bunting!

You probably remember the Summer Bunting I made recently


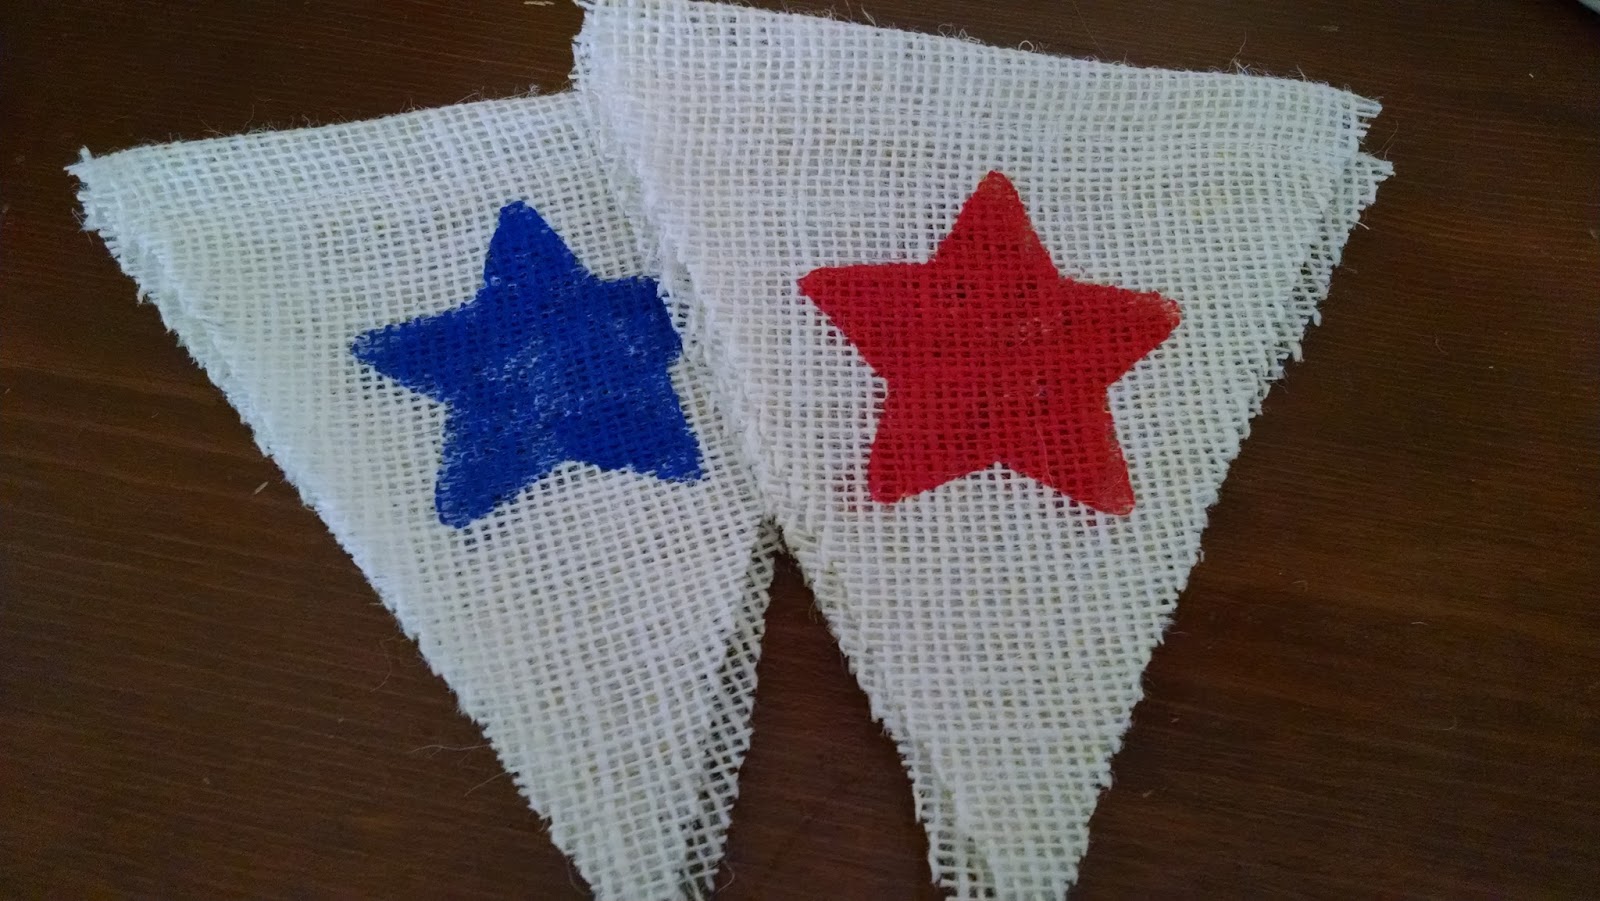
and you probably remember the red and blue stars and wondered, where is that bunting?  Well here it is! 


I also added the blue-striped ribbon between the flags and took off one of the flags (seven instead of eight), but really it depends on how far you are hoping to go with your bunting!


 Go HERE to see how to make this awesome bunting!!


 Happy Holidays!!!

Saturday, June 6, 2015

Summer Decorations: Bunting!

So our current home has a fireplace... but it's Arizona, so I don't really think we'll use it much... somehow...  but with it comes a mantle, which has been lots of fun to decorate!  I decided I wanted to make a summer bunting with burlap to hang across this summer.

First, I bought a half-yard of burlap at Walmart:


Second, I drew up my pattern.  I made a triangle then cut the ends off the top so I could fold it over the string with out fabric poking out the side:


I then cut sixteen flags, eight for each of two buntings:


Then I drew my stencil.  First I found a star and flower I liked online, then I traced them onto poster board and cur out the insides to make my stencil.  I cut the whole flower, then the inside circle separate.

I set up a station to stencil my flags.  I did four blue stars, then four red stars, then all the yellow flowers, finally all of the brown flower centers.


I used basic, 50cent, acrylic paints and a paint bush made from a sponge clipped with a clothes pin, a surprisingly useful brush!


I tied some string between my kitchen chairs and clipped each flag up to dry.


Then, in a moment of weakness I went to bed and left my paints on the counter....


The next morning Mr. A helped me put them away.... but not after first trying to open the bottle of blue by himself.


I didn't take a picture of this step, but I used clear school glue and went around the edges of each flag to give it some stability and to minimize fraying.  It is burlap after all!


Next I folded down the top of each flag and sewed it down.  You could also use hot glue... I just wanted to make sure it wasn't going anywhere!


Yikes!  We're almost there!

Finally, I tied some jute/twine onto my trusty crochet hook and threaded the string through each flag.


Then I hung the bunting up to enjoy!


I love it!  So cheery!  Stay tuned for the patriotic version!