Friday, November 4, 2016

Thankful Tree

Last year as we hit November we realized Mr. A really didn't understand the concept of being 'thankful.'  As such I created our thankful turkey!  It was really simple, a big circle of butcher paper a smaller circle and rectangle for a neck and head and a bunch of construction paper feathers.  

Starting the beginning of November every night before we ate dinner everyone would say something they were thankful for!  Mr. C often said e-i-e-i-o as he knew the dying but still had a generally small vocabulary, and Mr. A repeated what we said a lot at first, but with time he started to come up with his own things, like cheese, airplanes, & grapes.
We still have our thankful turkey in the wall, but this year we added a thankful tree to remove us to be thankful again!
All I did was cut out a trunk from one sheet of construction paper and the place where the branches split from another piece, then used the scraps to make the branches longer. Then I cut leaves from different colors of paper and put them in a container with markers and tape. Mine is an old butter tub that I wrapped in fun paper.
Now every night we write on another leafand stick it on our tree.  I figure by Thanksgiving we should have a fully leafy tree!!!

How do you remember to be thankful this time of year?

SaveSave

Friday, October 7, 2016

Be-YOU-tiful Bow Hanger DIY!

My husband jokes that I've waited 27 years for a girl, he's not going to hold me back in making cutesy girl things!  I am the oldest in my family with three younger brothers and then our first two kiddos are boys (of course)!  So when we found out our sweet baby is going to be a girl, we were both kind of excited!

Now over the years I have made things here and there for little girls, sometimes for our nieces, and sometimes just in hope of a future daughter.

So I have a couple of bows and headbands and I wanted a cute way to display and organize them!

I always want her to feel beautiful, in a gorgeous dress or a slumpy t-shirt, so I give you the Be-YOU-tiful bow hanger!


Ribbon of choice.  I recommend a satin ribbon or woven, 1inch.  A sheer won't be as strong or hold it's shape as long!


Canvas!  This was one left over from my button art project last year.  


In addition, hot glue, tulle, and a staple gun.

First I painted the canvas purple and in yellow at the top "Be-You-tiful!"
Then I figured out about how far apart I wanted the ribbon, measured and glued the ribbon down. 


I also glued down some tulle to the top for a hanger.  After the glue dried I stapled the ribbon and tulle down to make sure they wouldn't pull off.


Voila! Bow holder for all the bows little girl will surely have! (especially if I have anything to do with it!)

Monday, October 3, 2016

Halloween Crow Wreath

Well, somehow I managed to not get any pictures of the process, but I made this awesome Halloween Crow wreath for my Husband's cousin, and it was SO EASY!!!


You'll Need:

A Wreath Form, mine was a wicker one, which I thought was cool because it looked like a nest or sticks on a tree.

Crows to go around.  Mine were from the dollar store, they are foam with feathers and black glittery!


Trusty Hot Glue Gun.  Seriously, where would a crafter be without hot glue?!

floral wire (or other wire) and wire cutters

First: Spray paint the wreath black!

Next: I pulled off the feet from each crow and wired them to the wreath.  I stuck the floral wire in the holes where the feet came out and a glob of hot glue.  Then I put a glob of glue on the bottom of the birds and wired them to the wreath.  Once the glue had set I went around from the bottom of the wreath and filled in any gaps between the birds and the wreath with glue.

You'll have to decide where you want the wreath to line up with the birds.  I wanted to make use of the widest part of the birds to use less birds, so placed my birds accordingly.  If you want a bigger wreath or to use more birds attach them closer to the head, where they are more narrow.


When everything is dry, take some black paint and touch up any spots that aren't black anymore.  Some of the glitter had rubbed off the tops, and there were white spots where I had pulled the feet out.

Finally hang up your awesome wreath on a wreath hanger or use some floral wire to wire it to a hook or nail or thumbtack on your door.

Enjoy!

Wednesday, September 28, 2016

Something Special Coming February 2017!


I don't know why the pic won't load all the way... I tried twice.


Friday, September 9, 2016

Paw Patrol Birthday Party!

"Paw Patrol, Paw Patrol, we'll be there on the double!"

Mr. A has really been into paw patrol these days so naturally for his birthday he wanted a paw patrol party!

His favorite color also happens to be red so naturally his favorite pup is Marshall, the fire dog!


We started with Fire hats & Puppy ears!


Then of course we put out the fire at someone's house by popping the balloon flames!
(Tutorial found HERE)


We colored pups and glued googly eyes!


And what is a Birthday Party without cake!  Paw-print-Marshall-cup cakes!


White with black (chocolate chip) spots, with a red hat!  Just like Marshall!


And snacks!  Grape-balls, Puppy chow (Reeces puffs cereal), and cheese-fetch-sticks!  and of course, don't forget the water bowl (or pitcher any way!  I didn't trust 4yr olds with a punch bowl...)


And of course, LOTS of red balloons and streamers!  and a few extra fireman hats on the wall!


The kids had so much fun!  The building on fire was especially enjoyable!


Mr. C & Mr. A playing with sticker books (gift from a friend) after everyone went home.

SaveSave

Wednesday, September 7, 2016

How to: Vibrant Cake Colors!

My son's favorite color right now is RED.

It's also his birthday...

Which naturally means he wants a red cake...

I don't know if you've every tried to make a cake mix red (without using red velvet of course), but most of the time it just comes out.... pink.

In fact, most red velvet recipes call for an ENTIRE BOTTLE of red food coloring!  Not just one of those cute little squeezy guys, a full 2 tablespoons, 1 oz bottle of food coloring!

Heaven forbid you need green or orange or yellow... oh yellow!  I've never tried, but I'm pretty sure to get a vibrant yellow you would need more than 1 bottle!

I just really don't like eating a cupcake that will turn your mouth and insides un-natural colors!

So with this in mind we were shopping for cake mix (because for all my craftiness, I'm a cake-mix gal!) and we passed the jello mixes - Eureka! - Vibrant colors and extra flavor to boot!

It was really simple really, just follow the directions on the box and then dump the jello mix in! (the small size box.  I used the off-brand variety)

Boom!  Red cake that doesn't turn your insides funny colors, and bonus points, it tasted oh-so good!


Yum!!!

They had a slight raspberry taste and were absolutely delicious!

I used Raspberry, Strawberry or Cherry probably would've been even more red, but I prefer raspberry. (had a bad experience with cherry jello one time, some sugar free jello varieties taste like benadryl *shiver*)

Show me your creations! 

Friday, September 2, 2016

Fire Hat & Dog Ears!

So Mr. A wants a Paw-Patrol-Marshall themed party!  So we decided to make totally awesome fireman hats with doggy ears! 

We started at Firehouse Subs where they very kindly gave us 10 of their hats, no questions asked, for free!  THANKS Firehouse Subs!!!


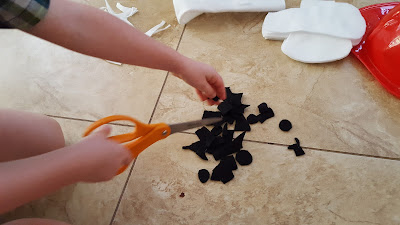
Next I gave the boys some scissors and black felt and told them to cut spots for the ears!  Now we started with safety scissors, but they just didn't cut it (haha, that was unintentional, but really!)  So once I was done cutting out the ears I closely monitored while they used my sewing scissors to cut the spots!

I was going to figure out how to make a template for the ear but just didn't get it done, so if you want to use my ear shape, just print the picture below and cut it out.  You can probably size it on your computer to any size you want.  I cut them out of white felt.


I have a big bag of felt scraps, mostly from by-the-yard projects that I pulled this felt from!  I think this is leftovers from snowman-stockings one year in college!

The boys struggled with curvy edges, so after we had enough spots cut I had them arrange them on the ears and I rounded out the edges and glued them on with my trusty hot glue gun!


Boom, ears done!  I seem to have lost the picture, but after the glue had cooled I put a tiny-thin bead of glue just underneath the rim of the hats and stuck on the ears (make sure the spots face out!  If you can turn down the temp on your glue gun, do, the glue will melt the hats if you apply too much or it's too hot!  Or, if not, just unplug and let the glue gun cool down, then plug it back in and use it as soon as you can squeeze glue out, not necessarily when it's 'hot'


Hats, done!  They looked soooo cute on all the kiddos, I can't wait to hand them out at the party to all of their friends!

SaveSave