Monday, February 8, 2016

Pirate Day!

 AAARGHH Me Mateys!  'Tis Pirate Day aboard our Ship!  Me Mateys really love Pirate Day, so we's a goin' to share it with a you!


Whew!  It's hard work to talk like a pirate sometimes!

We have done pirate night twice now and my boys LOVE it!  This time was at the request of Mr. A specifically :D

This time I kept things a titch simpler than last time, but I'll fill you in on all the details!

First I made pirate hooks!  I had pictures, but who knows what happened to them... so check out this tutorial from East Coast Mommy on a really easy way to make awesome hooks that my boys LOVE to play with!

Next!  Telescopes!  Again, I had pictures, they are gone :(  But!  These are also super simple!  All I did was paint toilet paper tubes black and then glued strips of foil to make them look like telescopes.  You can check out similar telescopes here, at The Imagination Tree to see what I mean.

Next, Treasure Maps!  These maps didn't actually lead anywhere for our activities, but they could!  We just used some scrap paper, crumpled and tore it a bit (no pirate map is smooth and perfect, right?!)  and drew a map!

Last step, I pulled out some bandannas and eye patches (The Party Store, 40c each!) and a little mascara for a scruffy beard!

Now for Dinner!


We've got,
 Green-Bean Seaweed!

Golden-Cookie Dabloons

Lady Fingers
 (leftover pie crust with butter and cinnamon-sugar)
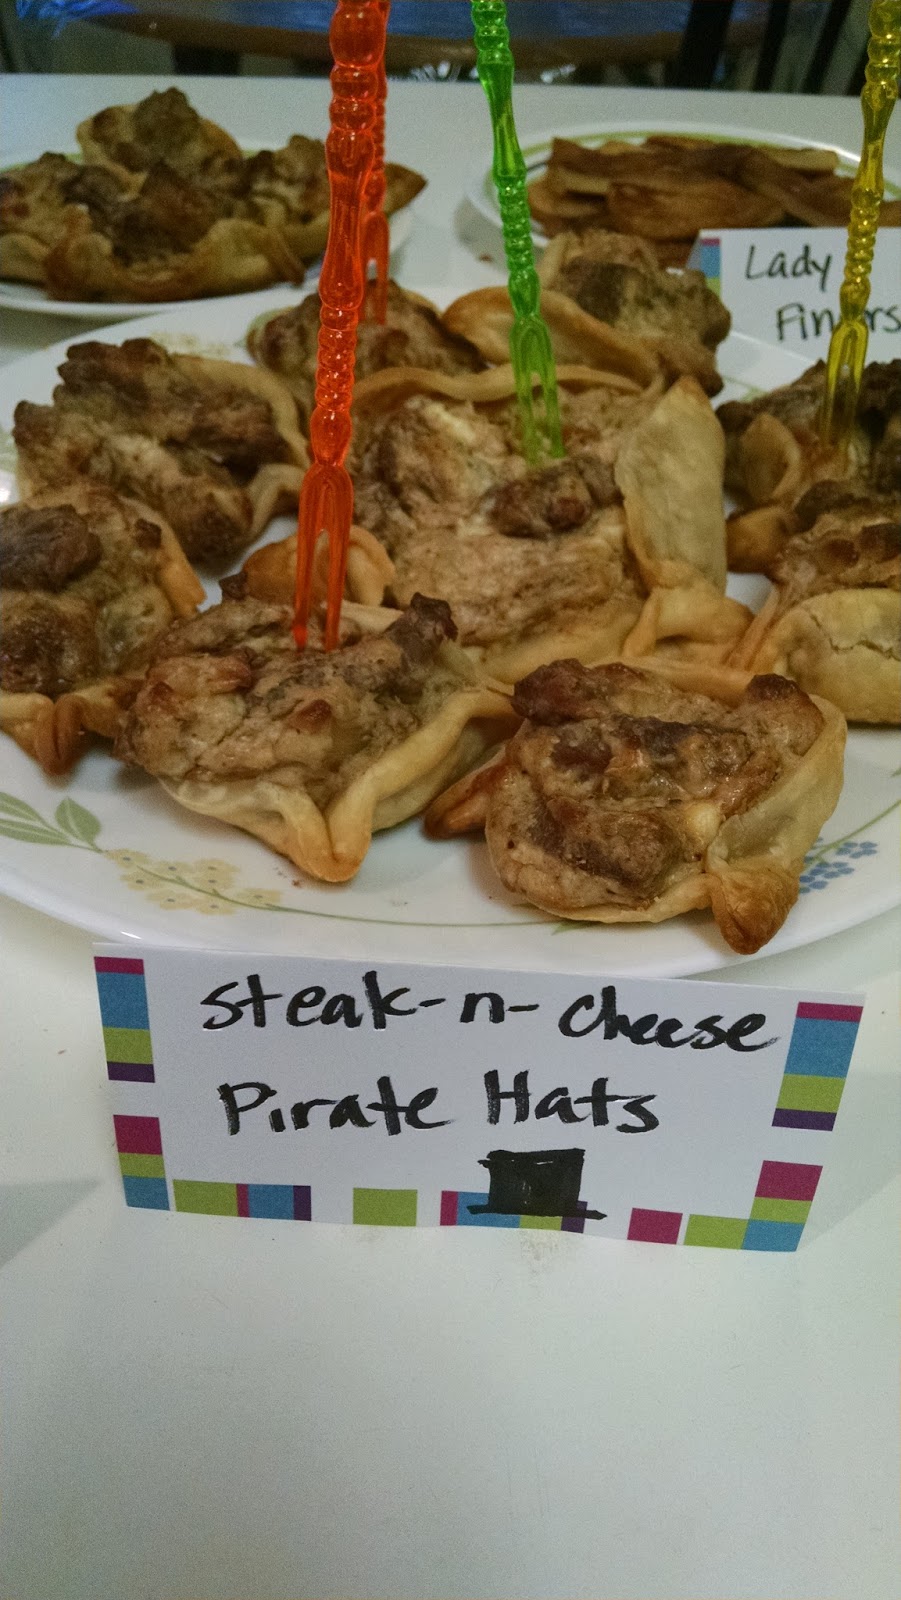

Steak-n-Cheese Pirate Hats!
(circle of pie-crust, strips of steak, onions, and green peppers, mixed in with cream cheese and mozzarella cheese! mix everything together, then put a scoop of the mixture in the middle of a circle of pie-crust then pinch to make a three corner hat.  Cook until crust is done.  Yum!)

Silver-Cheese Dabloons
(slices of string cheese)

And Finally,
Octopus Grog!
(Lemonade with purred raspberries, strawberries, and blackberries!)

Yum!!  Honestly you could do anything your family would like!  Last time we had octopus leg-spaghetti and cannon balls (meat balls).  Get creative!

We finished off this pirate night with a round of Jake and the Neverland Pirates, but last time we watched Hook with the boys and then me and my husband watched Pirates of the Caribbean after the kids went to bed!

Yo-Ho! Let me know how your pirate nights goes!

Friday, February 5, 2016

Primary Chorister Staples

Every chorister has them, and everyone's are different!  Those go-to, use almost every week, great for when you're in a bind, activities!

Mine are simple so far, but I've used them lots already!

First, the dice!  These are awesome, each  side of the cube has a different picture.  Pick a child to roll the dice and then sing in the manner it says on the dice!


Blank Cube (Note: I do not claim the cube!  I got this design from www.atozteacherstuff.com)
Add your own pictures!


The Children - Children only
Mouse - Quiet as a mouse
Bee - Buzz the chorus
Teachers - Teachers only
Girl - Girls only
Boy - Boys only


Jump rope girl - Hop up and down while singing (maybe just the chorus)
Piano - No piano (or only piano if you need a break or want them to listen more)
Flamingo - Stand on one leg
Stop light - Use Stop and Go sign (see on down a bit)
Giraff - Stand up tall!
Lion - Loud like a lion! (you'd be amazed how well this works!  Make sure you tell them it still needs to be pretty though!)

NOTE: NONE OF THESE ARE MY PICTURES.  I DO NOT CLAIM ANYO OF THEM, I FOUND THEM ALL ON GOOGLE!!!  If anyone claims one of these pictures and would like me to take it off, please let me know and I will gladly take care of it! :D

And then there's my Stop and Go sign.  You probably know the drill, but basically you hold up the sign and randomly flip it between 'stop' and 'go.'  This really gets the kids to pay attention, no one wants to be the only one singing!  (you can use this with or without the cube!)


Lets see, oh yes, one more!

I haven't had to use this one yet, but if you have a 'energetic' (you know, rowdy, antsy, noisy, chatty, etc....) primary, this one can be useful to help them remember how to be reverent.


Basically you would just talk about it from time to time and hang this somewhere they can always see  it, and if they're having a rough time just stop, raise up five fingers and wait.  Maybe say something like 'give me 5 guys, give me 5.'

Good luck!  If the documents won't let you download them for some reason, let me know and I'll fix them!

Again, I know the images I used aren't my original work.  So, if you do own them and would like me to take them down, please, let me know!  I would be happy to!

Tuesday, February 2, 2016

Cute as a Button - Dinosaur Button Art!


Some friends and I got together to make this awesome Valentines decoration,


And while we were there we had three... yes THREE potty accidents.  Just too much fun with a bunch of friends I guess!

So by the time we got back, Mr. A needed some loving' and attention!  Mr. C went down for his nap before we got home (we were like 2 minutes from home! :D ) and me and Mr. A got to work!

First we found a dinosaur that Mr. A liked,


(Sorry he's upside down!) Then we cut him out of felt.


Next we got to work glueing the buttons on!


We started by going around the dinosaur's outline


Then filled in the rest!  We also layered the buttons a bit to cover holes and add extra dimension!


Next we took it outside and spray painted the buttons!


Green for the body,


Blue for the spikes!


While the paint dried we painted a canvas with a palm tree and sun!  I simply found a palm tree I liked online, printed it, cut it out and filled it in with paint!  Where the tree went over the edge I painted around the corner so if you see it from the side  it continues around the edge.


Finally, we glued on the dinosaur and his spikes!  


Mr. Dinosaur now hangs over Mr. A's bed!


Cute as a button!


This guy we did basically the same way!  I cut the heart out of burlap first (quick tip: I actually found a heart I liked online first, printed and cut it out, then cut it from the burlap!  I didn't trust myself to make a symmetric heart!).  Then I glued on a bunch of miscellaneous buttons, then spray painted it red, just like the dinosaur.  On the canvas I marked then painted some black lines and then the 'forever' on the bottom.  (you could also do 'you + me' or 'love' or any variety of things!)  Once the paint dried I glued the heart on the canvas!

A bag of only red buttons ranged from $3-$10 so we opted for a $1 bag of random buttons, thus the red paint.  I was concerned that I would end up with a flat, one color heart, but I didn't lay the paint down too thick so the shade of the original buttons came through enough that I ended up with dark, medium, and light buttons in the heart.

Enjoy!  Share pictures of your button art!

Saturday, January 30, 2016

How to Clean Copper - You Won't Believe How Easy it is!

My mom gave me this copper bow while we were visiting over the Christmas holidays.


She has had it for a while and it had become tarnished

I did a little research and found the easiest fix you've ever heard of!

I almost guarantee EVERYONE has this ONE ingredient to clean the tarnish off copper

Ketchup

That's right, ketchup!


All you do is wipe ketchup on the tarnished copper surface and let it sit.  No scrubbing, no rubbing, just let it sit 10-15 minutes.

Now rinse it off and...


I'm not kidding!  No scrubbing, just the patience to let it sit, then rinse!


This bow now hangs above my sink next to the window and it sparkles in the sun!


See what I told you?  Couldn't be easier!


Thursday, January 28, 2016

Easy Bird Feeder

 I was cleaning off the top of the fridge the other day and came across a box of OLD Cherrios... I mean like, I-think-I-opened-the-box-before-we-moved-to-Arizona-OLD!

But rather than throw them away I decided to use them for two other - no-eating - things.  The first,

Bird Feeders!


This is seriously one of the simplest ideas ever!  First, string some cherrios on a piece of wire and wrap the end around.


Then string on a bunch of cherrios.


Then, wrap the end around the beginning and bed into a shape!


Finally, hang them somewhere outside for the birds to enjoy!  Seriously, it is that easy!

You could even use pipe-cleaners, but I didn't have any of those handy.

Enjoy!

Wednesday, January 27, 2016

One-Pan-Chicken-Dinner!

 This is some serious-yummy!!!  and sooooooo simple!


Simply line up some chicken, chunks of potato, and frozen green beans.  Then I sprinkled diced onion and minced garlic across all of it.  Some salt, pepper, and paprika across everything.  Finally, a drizzle of olive oil!

Then Bake it until the Chicken is done at 400F (20-ish minutes, depends on how defrosted the chicken is!


 When it is just a few minutes from done sprinkle cheese across the potatoes and put it back inuntil the cheese is melted.

Serve and enjoy!  We liked this so much there were no leftovers for my husband's lunch the next day!  Enjoy!


Monday, January 25, 2016

Dartless Balloon Game

I recently was called to lead the music in Primary in our LDS ward.  Now if you're not familiar with this calling, it essentially means I am in charge of leading the music during opening exercises and then lead a 20 minute music set in which I teach the children (ages 3-11, which is somewhat unusual, often it is broken into Jr & Sr primaries at 3-7(turning 8) & 8-11) the primary songs, specifically songs for the yearly primary program in the fall!

This year has a beautiful line-up of songs, starting with a new song, If I Listen with My Heart.


It is a beautiful song!  

We've already learned verses 1 & 2 so this week we needed something new to learn verse 3.  So after some brainstorming with my husband he reminded me of this great idea to have a dart-less balloon game!  It was the perfect idea!  


No sharp things, but great incentive to sing!  Most kids love the idea of popping a balloon!


First, one foam-core board from the dollar store, the words printed out big, 12 balloons, 12 tacks, and the numbers 1-12 printed out big.


Next I rolled up the numbers and stuffed one in each balloon.


Then I measured out the board and drew lines that intersect 12 times.

The rest of this I waited until the night before so I didn't have sharp things hanging out at the house all week and balloons taking up way too much space!


Saturday night I poked the tacks through the board at each intersection and used masking tape to tape them down so they didn't fall out


Front of the board

I also inflated all the balloons.


Right before I did the activity (at church, between Sacrament meeting and singing time) I taped the balloons to the board.


They are taped so the tack does not touch the balloon, but is really close!  The idea is that when the child throws a beanbag it will push the balloon against the tack and pop the balloon!


Then when we were ready to go I put the word strips with the third verse on the board and we sang it through a couple of times, talking about the words and such.  Then I let one of the sunbeams (ok, so it was Mr. A, I may have bribed him that he could pop one if he would go potty....) toss a beanbag, and on the second try it popped!  The kids thought it was the coolest!  Then we took the number that fell out and took down the corresponding word strip (12 balloons = 12 word strips)


Then we sang the song again (without the chorus) with the missing word strip.  If they sang it well (got most of the words, sang loud and 'pretty') we did it again!  Sometimes we had two people pop balloons to speed things up a bit.

We didn't get through all 12 balloons in primary, but Mr. A & Mr. C had fun finishing them off when we got home!!!


There are soooo many possibilities with this activity!  This could become your traditional Balloon Pop game, you could put candy in the balloons and it becomes a modified piñata, or you could use it to learn colors, for motor skills, the possibilities are endless!  Enjoy!


I love to share ideas!  Just one request!  If you want to put this idea on your blog too, please link back here to my blog, share the love!!