

Aren't they so cute?? I love fall decorations that can be turned one way for September/November, then in October can be converted to Halloween! Makes decorating during a busy time of the year so much faster! And they're so easy too!
I started with three wood blocks! Theses used to be blocks from my kids toys, but I've never liked the colors these particular blocks were and frankly they didn't play with them often so it was more than time to re-purpose them!

White Paint!
That's right, add just a tiny bit of white paint to your orange pain (or other light color, like yellow!) and suddenly your paint is more opaque. I painted 5 sides first, then when they were all dry the one side that was left. The one side took 3 coats, the other sides took 3 coats of no-white, orange paint and 3 coats with the white *face palm.* Lesson learned!
Have you ever seen the pencil-rubbing trick for transferring designs? I had my doubts, but it works so well!
Basically you print off the words or image you want on just regular paper, then you take a soft pencil (like the standard #2 pencil from school) and scribble all over the back of the image.
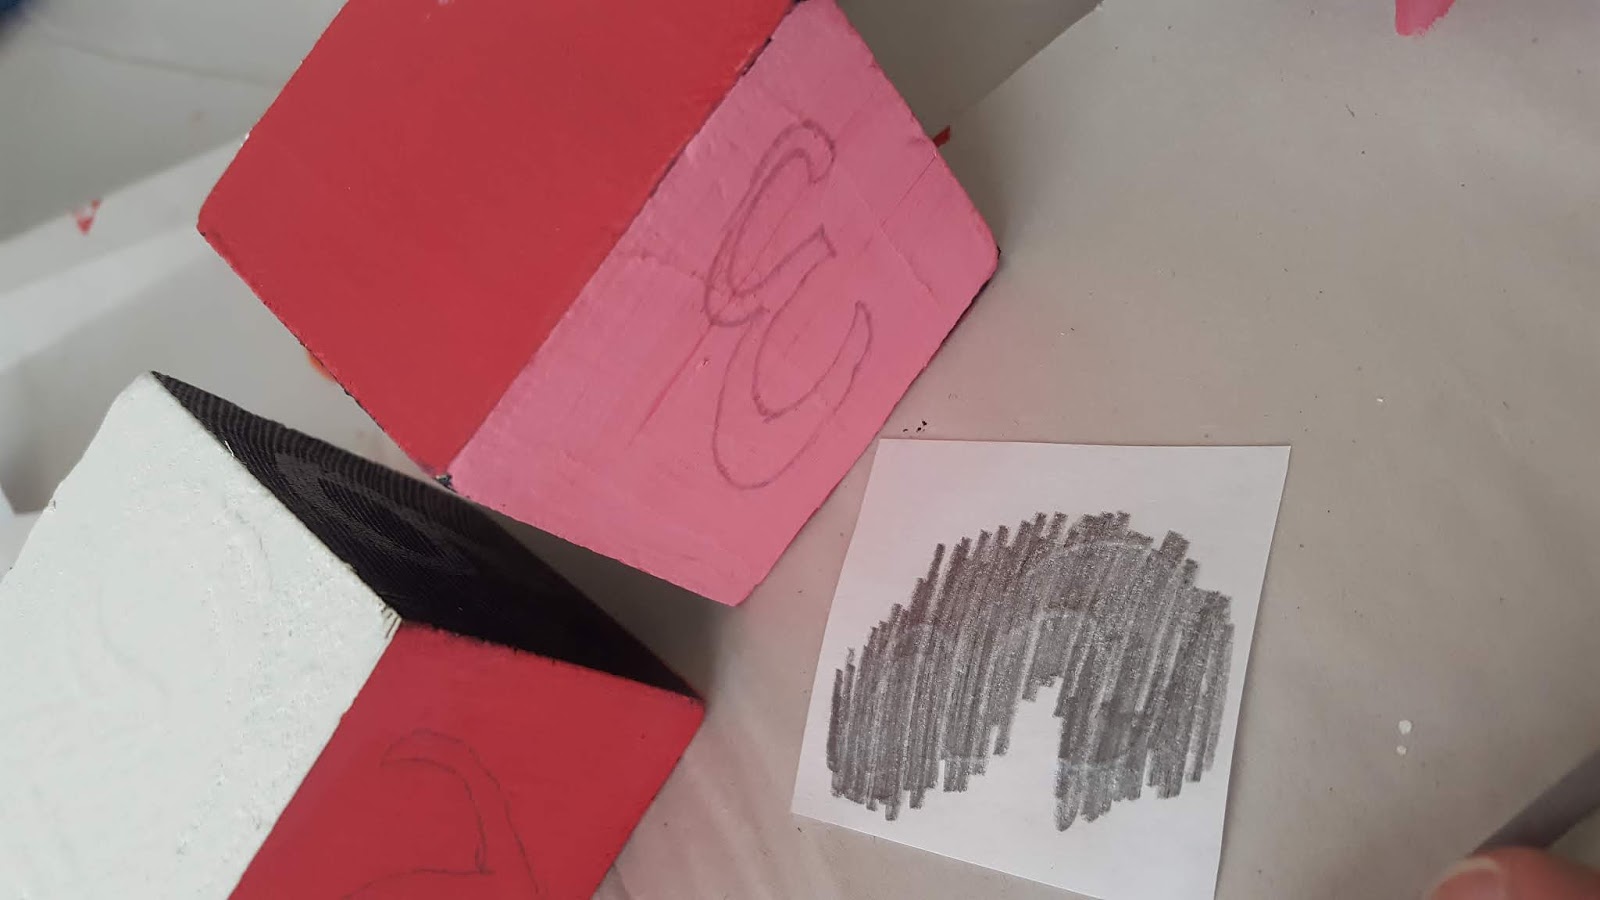
Just to clarify, you scribble on the back of the printed design!
Now center the paper on your block and trace the online on the top of the printed design. The pencil on the back will transfer to the block, you don't even have to push hard!

I know what you're thinking, where did the pink blocks come from?? I did two projects that day but only took pictures of this technique once... oops!
Then, using a fine tip brush, fill in the letters, I chose white. I used a basic Arial Black font and did my best to get 1.5inch letters.

Now when you are looking at the letters you want to put your jack-o-lantern faces on the side either directly left or right of the letters, I chose left.
I just drew it free-hand in pencil first, then filled it in with black paint! You could also use yellow paint and I think glitter would be a nice touch, but I only had orange... oh well.
On the top of the "B" block I drilled a hole and hot-glued a stick from my yard in the top.

For a final touch I hot-glued a jute/twine bow to the base of the stem. don't put a stem on all of the pumpkins if you want to stack them!
However, they would look really cute side-by-side as well, in which case they would all want stems.

For the just-fall look, simple turn the pumpkins around so the letters/faces face a wall or generally out of sight. I also realized today that for the bottom two pumpkins you can put one of the Halloween-specific sides face-down so you only have to hide one side of them.

Enjoy!!! I'd love to see your take on these adorable pumpkins!
No comments:
Post a Comment