Saturday, October 27, 2018

Yummy Apple Cider Donuts! (Dairy Free of Course!)

Do you know how many grocery store bakeries make dairy free donuts?  Zero, zilch, nada, that's how many.  Unless there's a vegan bakery near by you will struggle to find dairy free donuts!  

Because of this, last fall I bought these silicon doughnut pans from Amazon. (As of when I am writing this article, I am not receiving anything from Amazon if you purchase these pans... If they're even in stock!  I just really like them!)

I chose silicon over metal because some people said it was easier to get the donuts out in one piece, which considering how I get the donuts out (peel the pan off the doughnut) the reviewers are probably on to something.  I chose these ones because  they had good reviews.  Do note that these, and most doughnut pans, are smaller than you standard donuts, I think this is so they will bake through.  But they're just the right size for a guilt-free (or less guilty anyway) snack!

Now that we have all that cleared away, let me give you one of our favorite doughnut recipes so far, Apple Cider Donuts!  So tasty, lots of yummy spices, cinnamon and nutmeg, Yumm!


First thing, I'm not going to put the recipe here directly, it's not mine.  I'm going to send you over to Sprinkle Some Sugar
for her recipe, so go over, take a look, then come back for my switch-ups and how I make it Dairy Free!


Oh good, you're back!  

So I've tried lots of ways of dispensing the batter into the pans, just do it.  Get a zipper-bag and snip the end, I promise it's worth it!!!  

Also, just because you're using a silicon pan doesn't mean you can skip spraying it.  SPRAY THE PAN WITH NON-STICK!!!  Your future self will thank you!!!


I have found that because the pans are so floppy, I have the most luck putting them on a jelly-roll/cookie sheet when I bake them.  I just worry they will dump all over my stove and make a huge mess!

DAIRY FREE

So the original recipe includes buttermilk.  I switched it straight across with Almond milk, no problems!  Buttermilk will be thicker and a bit acidic, so you could also use soy milk with a splash of lemon juice or vinegar too, or the splash of acid with the Almond milk, but I just put straight Almond and they were delicious and moist!

I've done two different things for the topping, either coconut oil and powdered sugar to make a glaze, or your diary free butter replacement of choice, melted and used the same as her regular butter.  Both are delicious!


As always, don't forget the timer!!!

Oh, I almost forgot, if you just don't mix water into frozen apple concentrate, you basically have the same thing as the reduced apple cider/juice she uses in the recipe... saves so much time!


YUM!  Enjoy!

Tuesday, October 23, 2018

Halloween To-Do Round-up!

As Halloween approaches there are still so many projects I want to do!  Some are Halloween/Fall and I still can, but some are holiday specific.  As such, I thought I would do a To-Do Round-up, a bunch of my someday projects!


http://mycottoncreations.blogspot.com/2012/09/spider-web-table-topper-tutorial.html

http://simpleplayideas.com/pumpkin-memory-game

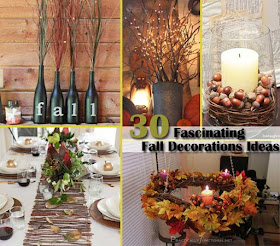
http://www.woohome.com/interiors/top-30-fascinating-fall-decorations-for-your-home

http://www.one-stop-party-ideas.com/Preschool-Halloween-Party-Ideas.html

https://thrivinghomeblog.com/31-easy-halloween-crafts-for-preschoolers/

This was my favorite Halloween-game as a kid, and my kids love it too!

https://2beesinapod.com/2017/08/16/fall-embroidery-hoop-wreath/

http://pinningeveryday.com/2013/10/tp-roll-pumpkin-craft
We actually did do this one, just never took any pics, so fun, easy, and cute!  Try it!

Wahoo!  That was fun!  If you have any more that you want to do, or want to see me do, or think I might like, shoot me a link in the comments below!!!  Happy Crafting!!!


Wednesday, October 17, 2018

Halloween Round-up!

With Halloween just around the corner I figured I would bring all of my old Halloween posts to one place!  Did you know my very first post was a Halloween post??  Sure was!  My Halloween round-up!


So my first ever post was about these amazing dinosaur tails I made for us for our SECOND Halloween in Arizona!


This is important, because our first Halloween in hot-Arizona we died of heat!!!  Besides only living here for a couple months at that point, I made our costumes for cool weather, not still-in-the-100's weather!  The dinosaur tails were accompanied by Dino T-Shirts and shorts!  So nice in the heat!


Next is my kiddos favorite decoration, our Halloween Ghost tree!


Next is an amazing Crow Wreath I made for my husband's cousin!  Super simple and it only cost me $8 to make!


Next is a favorite from this year, the eyeball decoration!


Finally is another new one from this year, my interchangeable-pumpkins!  So easy!  And in our house, good for decorating from sometime in September through Thanksgiving!


What are some of your favorite Halloween projects??


Friday, October 12, 2018

Halloween Eyeball Decoration!

Here's another spookily cute Halloween decoration!  Everything for this project can be purchased at the dollar store!  


All you need is 
A package of assorted googly eyes from the dollar store. (or more depending on how large you're making yours, mine fit on a 8.5x11 sheet of paper)
Twine/jute/ribbon/whatever suits your fancy for hanging the decoration
Paper/computer/printer
Cardboard
Scissors
Hot glue/hot glue gun

First print the shape you want.  I did the letter "P" for our last name.  You could do any shape, letter, anything you can think of!  Cut it out and glue it to your cardboard


Then cut that out!  


Then it is really just as simple as using your glue gun to glue the eyes on!  You don't want to use too much or too hot of glue or it will melt through some of the eyes.  I actually have a couple eyes that don't wobble because the glue melted through the back...

I also recommend gluing the big eyes on first, spreading them across the entire letter, then filling in with the little eyes.  Then you have big eyes over the whole thing, and don't run out.

When you have it covered, step back and make sure there's no drastic bare spots.  Little bare spots will be hidden by the black back and the busy-ness of the eyes!


Once the glue was dry/cool I flipped it over and glued my jute hanger to the back with a big glob of glue!


That's it!  I felt like mine needed something more so I added a cute little jute bow on the top corner to finish it off.  So easy, so simple!  Enjoy, and happy haunting! 

Tuesday, October 2, 2018

Halloween Ghost Tree

Happy Halloween!  I'm not huge on Halloween, other than the whole costume part, that's fun!  I normally just decorate for fall, but these cute little ghosts are lots of fun!  We hang up a bunch on our front tree for a spooky Halloween tree!


So these are super simple, first I cut a bunch of white knit fabric into squares and sew a 3ft piece of twine to the middle.  Then I wadded up plastic grocery bags to make the head.  Tie another piece of twine to hold the head together and hot glue on a googly eye.  


That's all there is to it!  Then hang them up in a tree, or from an archway, or anywhere you can think of!  Happy Haunting!

PS. Make sure the string that they hang from is attached to the top... if you attach them to the same string as around their heads... they look like they were hung... like noose style.